|
|
 
These pages describe how I repaired the control dial on my Canon A2E.
Please see the first page of this series for
the background. This page contains several photographs and may take a
minute to load.
| |

|
|
The camera's front cover must be removed before the top can be
opened. I removed
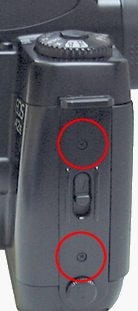
the two screws securing the film compartment latch, as shown. This
caused the latch mechanism to be displaced slightly and the camera back
popped open. In hindsight I should have opened the back first, and then
loosened, but not completely removed these two screws. At this point I
left the back open and replaced these two screws, but left them quite
loose.
|
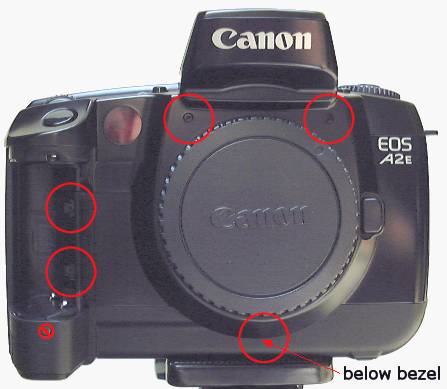
I located and removed all screws holding the front of the camera in
place.
| |

|
|
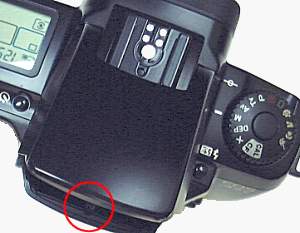
One of these is inside the flash housing, which can be safely
opened only with the battery in place and the camera turned on. I popped
open the flash and removed the screw, being careful not to damage the
finish on the front of the camera body with the screwdriver shaft. I
then closed the flash and removed the battery cover and battery, setting
these parts aside. The photo shows the location of this screw.
|
The remaining five screws, including two inside the battery
compartment, were removed. It was not necessary to remove the screw
below the battery compartment. After removing the body cap, the front
cover lifted off easily. I set this aside and replaced the body cap. I
also retightened the two screws in the side latch plate, and then closed
the camera back.
 
Next, removing the top cover.
|


