 |
|||||||||||||||||||||||||||||||||||||||||||||||||||||||||||||||||||||||||||||||||||||||||||||
|
|
These pages describe how I repaired the control dial on my Canon A2E. Please see the first page of this series for the background. This page contains several photographs and may take a minute to load. Several of the messages I’d read on the ‘Net while researching the problem mentioned a repair shop in California called Horizon Electronics. Now that I’d seen the inside of the camera and knew which parts were needed, I called Horizon with the intent of begging them to sell me a replacement dial. I talked to Naomi, who not only agreed to sell the dial, but offered to sell a dial modified to be reassembled with two metal screws instead of the heat-staked plastic pins. She also offered a replacement detent spring. I decided to order two dials and screw sets, “just in case”, and I got it all for the princely sum of U.S. $9.05 including shipping! The parts even arrived a few days ahead of schedule.
"Yes, the repair of the mode dial on the Canon A2 camera that I perform is a better
fix than Canons. I charge $85.00 plus $10.00 return shipping. I give a six month
warranty with my work and can turn the repair around in a couple of days. This
repair includes cleaning the camera. Let me know if interested. I am now located
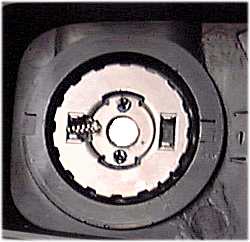
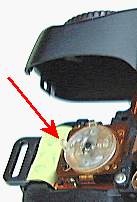
at: The control dial and detent ring were assembled with the supplied screws. This photo shows the dial in place. The detent ball is in (hidden) but the spring has not yet been seated.
Placing this spring was the most difficult part of the operation, as the spring would pop out of the slot with some force if not pressed completely into place. It took half a dozen attempts to get the spring in place and fully seated into the slot. After the locking button, its spring, and the locking plate were reassembled to the camera’s top the dial was tested, and then set to its locked position. The flex cable from the flash unit was reattached. The exposed gold contacts face upward, and the flex cable had to be carefully “walked” back into its mating connector. I later read on the 'Net that the connector for this flex cable can be opened, which would make inserting the cable very easy. I saw no evidence in my camera that the connector could be opened.
From this point, the camera’s reassembly was the reverse of disassembly. There was no need to force any parts into place, as everything fit easily together. It was necessary to “play” with the wiring harness that runs down the left side of the prism to position it to avoid pinching and to allow the top cover to seat completely. All screws were reinstalled except for the one in the flash housing. When reassembly was completed, I installed the battery, powered up the camera, popped open the flash, and installed the last screw. The cameras has, so far, worked perfectly. Remember, don’t try this at home! You probably can’t go wrong contacting Camera Clinic or Horizon Electronics for this repair.
|
||||||||||||||||||||||||||||||||||||||||||||||||||||||||||||||||||||||||||||||||||||||||||||

